The weather may be delightful but into every life (and garden) a little rain must fall! If you love entertaining outside, weatherproof cushions are essential. Comfy and fast-drying, these babies are perfect for accessorizing your outdoor space come rain or shine. For those sunny days when playing a round of free bingo with no deposit required indoors just isn’t an option – try crafting these (fairly) simple softies to make your garden complete.
Equipment

Getting the right bits and bobs for this project is half the battle. If you can find the right weatherproof fabric and the right kind of foam you’re almost there! In reality, putting these cushions together is the same as sewing any old cushion – the real difference lies in the materials. To make your outdoor cushions you will need:
- Outdoor fabric (canvas twill can work well, but there are materials specifically designed for outdoor use. Try ordering online or asking your favorite haberdasher!)
- Waterproof filling (look for a layered polyester type material – it’ll usually come in foam blocks you can cut to size – again, the web is probably your best bet for this stuff)
- A sewing machine (essential unless you’re a hand-stitching genius)
- A zip (you’ll need this to be the full width of the cushions you have in mind)
- Fabric scissors and pins
Instructions

Now it’s time to get busy…
- Decide on the size of your cushions (if you’re a certified non-sewing genius like me, I’d recommend sticking to squares and rectangles). Then cut out a strip of fabric twice the length of your finished cushion adding about 10cm extra to give yourself room for seams.
- Fold your strip of fabric in half and pin along two of the “open” sides. Then straight sew along these edges using your sewing machine. Go over this stitch with a zig zag stitch to make certain your cushion is nice and secure.
- Sew each half of your zip along each side of your “open” edge. Again, going back over your straight stitch to make certain your cushion is as durable as can be!
- Now, time to cut your filling. As I mentioned, if you’ve found the right stuff, you should have a “block” of layered polyester which you can now cut to size. Because this is a super-simple cushion, you may need to trim or double up your layer to get the right fit, but a spot of trial and error never hurt anyone!
- Turn your cushion cover inside out and pop your filling in. Zip up and you’re ready to go!
Handy Resources
If you’re looking for a more professional finish there are some great, more advanced tutorials and DIYs out there which you can try. Here are a few of my favourites:
- A Beautiful Mess have created some cracking outdoor cushions
- Sew Mama Sew can teach you how to make big, fat cushions with pretty piping
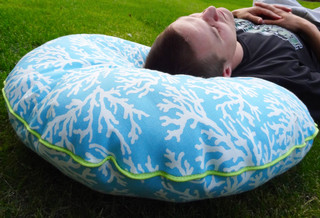
- Meg Padgett at Houzz has made squishy round cushions, perfect for lawn-lounging
Do you have any handy tips for our crafty readers? Share your big ideas and favourite tutorials with our readers below or get in touch on Twitter @TwoLittleFleas
This post currently has no comments, be the first.
Leave a Comment